I had hoped to get a little more done with the new project before spring break, but seeing as how it was finals week, it's really not surprising that I didn't. And so, spring break is here, and I won't be able to do anything computer-related for around a week or so (thank god). When I get back, though, that <audio> tag will dance for me. I promise.
Friday, March 19, 2010
Tuesday, March 16, 2010
Hubble Kaleidoscope
Turns out, when a piece of javascript runs very slow and everything I try to speed it up has no real effect, a previously fun project pretty quickly turns tedious. In this case, the culprit was slow drawing code, which in an animation gets called pretty often. Since it's the drawing that's the interesting bit here, there really wasn't much I could do. I decreased the number of calls to drawImage() by making the strips run horizontal instead of vertical, and then decreased the number of transformations the canvas undergoes by once again increasing the number of calls to drawImage(). In the end, I ended up using the drawImage() function to reflect the wedge I copy from the source image. Originally, I had used a scale transform on the canvas to do the reflection, but I suspect it's a bit faster this way.
At any rate, after a long week of tedium and end-of-term homework, the Hubble Kaleidoscope is finished. It runs really quite slow, and does its best to light my computer's processor on fire, so I've decided not to embed it into this blog post. It was getting to be quite tedious to make sure every variable I used had a different name for every blog post anyway. Be wary, javascript will certainly try to kill your computer, and if that doesn't work, it will try to hypnotize you into total obedience.
Here is the actual webpage with the Kaleidoscope on it.
Here is the source code (at pastebin.com).
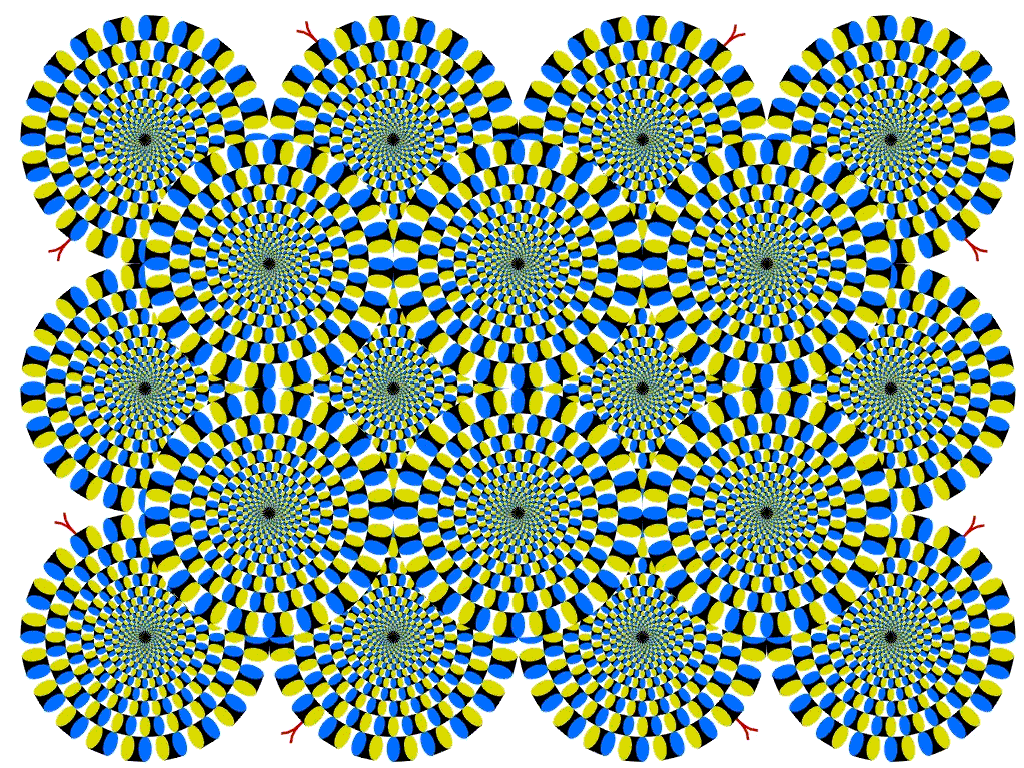
And here is a neat image to try the damn thing out with.

Next time I have free time, I think I will play around with the <audio> tag, and see if I have any better luck than when I first tried to add sound to the box killer game thing.
Monday, March 8, 2010
Zebras and stars
While thinking about how to best go about copying a triangular section of an image, I've realized just how much easier it would be to do this if the triangle had a couple of sides that are always parallel to the sides of the source image. This would also mean a much simpler algorithm for bouncing the wedge around the source image. On the downside, the bouncing would also be more likely to end up in a loop, where the wedge goes over the same areas of the source image over and over again. This seems like a small price to pay, but who knows, maybe it'll be annoying enough to go need fixing.
So, with everything nice and perpendicular, it seems easy enough to carve a wedge out of an image: just loop through the width of the wedge, copying a progressivly taller and taller 1px-wide strip of the source image. Doing this is much helped by this section of the canvas element's description.
...
triangle = function(kc,img,x,y){
 for(i=0;i<161;i++){
  kc.drawImage(img,       //Source
            x+i,y,        //Pos. in source
            1,(i*0.419),  //Size in source
            i,0,          //Pos. in destination
            1,(i*0.419)); //Size in destination
 }
}
I pass into this function a drawing context, the source image, and the x-y coordinates of where the wedge starts. The factor of 0.419 comes partially from basic trigonometry, to make the wedge have a nice 22.5 degree angle, and partially from experimentation, to make the wedges blend into a circle nicely. As it stands, this function, when called a few times on a translated and rotated canvas, will produce an image that looks like this:

It's pretty clear that while this is along the lines of what I want, it's not quite right. The problems are twofold: the white creases along where two wedges meet, and a striping of the wedges that aren't along the x or y axis.
The striping is caused by the fact that the little strips I am copying end up too skinny when distorted by the rotation of the wedge sections. A very simple solution to this is to simply make the strips wider than one pixel, so that they overlap, and stretching them apart a bit won't let the white-space underneath show through.
The white dot at the center is caused by the simple fact that anything multiplied by zero will be zero, and I start the for loop at zero. This too is easily solved by modifying the call to drawImage() to make the whole wedge shift slightly along the x-axis. This also happens to close up the white rays coming from the middle, in addition to the big hole.
The function, then, becomes this:
...
triangle = function(kc,img,x,y){
 for(i=0;i<161;i++){
  kc.drawImage(img,
            x+i,y,
            2,(i*0.419),
            i-1,0,
            2,(i*0.419));
 }
}
And the result looks more like this:
All that's left is some animation and an interface, but a combination of schoolwork and the time taken to write this post means I'll have to put all that off for a little later. Still, pretty good progress for a couple hours worth of work.
Saturday, March 6, 2010
Space looking all crazy
A couple of years ago, someone had sent me a link to this Onion article. I thought it was hilarious, and that the picture was a very neat effect. I also though I could totally do that, and it would be really awesome.
At the time, I was infatuated with flash, and figured that if anything could do the things I needed to be done, it would be flash. I suspect that was actually true, but I had conveniently failed to notice that it would really be me doing the hard work, rather than the platform. And so, through a combination of my laziness and one or two shortcomings of flash, the project stalled quickly.
I can't say for sure that the javascript/<canvas> combination is better suited to the task, but I am pretty sure it is at least sufficient, and there is at least one aspect in which it is better: the ease with which I can load images from off-site. As far as I know, such a thing in flash is either impossible, or requires more server configuration details than I was either able or willing to access. The ability to load images from wherever means I can pull in cool images myself, and let users enter image URLs to load into the kaleidoscope.
So, as I get started on this hopefully short project, let me define some goals and maybe even approached.
The Hubble Kaleidoscope
Making images look all crazy
1: Basic idea.
A Kaleidoscope is a neat toy. It consists of a cardboard tube, a couple of mirrors, and some glass or plastic beads. The mirrors are placed at an angle to each other at one end of the tube, the beads are poured in between them, and that end is capped off with a translucent piece of plastic. This way, when someone looks in the other end of the tube, pointing the end with the beads in it toward a bright light, the image of the beads is replicated by the mirrors into a repeating circle. Wikipedia has a nice article if this isn't clear.
The effect is quite cool, and there is no reason not to reflect a section of this or that image around a circle a few times, and as the Onion article clearly states, space looks all crazy as it is, so making it look even crazier should have great results.
2: Interface.
The resulting image will be a circle, so there ought to be a nice, neat circular frame to go around it. In addition to the frame and image, there needs to be a way to select an source image. I think a drop-down menu of some neat images I've found, as well as a text box to enter an image of your own will be good. Since I'd like the image to be animated, a way to stop the animation at a particularly cool-looking place would be nice. I always thought that clicking on the kaleidoscope image would be a neat way to do that, but a clearly marked button is probably a better idea.
3: Animation.
A lot of the hubble images I've found online are really big. This is great, but I would like to have a manageable size to the kaleidoscope. Specifically, I want it to fit into an iphone's screen. This means that at any one time, I'll only be able to reflect a small portion of a huge image, meanwhile other bit of the image might well be just as interesting to look at. To cover the whole image, I image the section of the image to be reflected as a triangle, bouncing around the frame of the source image. The script will then copy the pixels within that triangle to the portions of the screen where they need to go.
4: Resources.
Obviously, I won't be able to do without my canvas reference. I'll also need a good source of space images. The Hubble Heritage Gallery looks to be the perfect place to get them images, so it looks like I'm all set.
Now, all that's left is to sit down and put in the work. But I think I'll put that off.
Sunday, February 28, 2010
A blinking aside
This post isn't related to the explosion of boxes, but it is related to the blinking of chikins. In the near future, the organic nature of chikins will be permanently fused with an electronic brain, for a more regular blinking. The designer of such a brain will have need to be able to predetermine the rate of blinking for a given chikin. This is not a difficult task, but it does get tedious, and what good are computers if they won't do tedious tasks for us? Therefore, I present the glorious
Chikin Blinker Calculator
AKA 555 timer astable mode calculator and visualiser.
This simple script calculates the time on and off for a 555's output given two resistor values and a capacitor value, as well as the two resistor values given time spent on and off and a capacitor value. In addition, there is a convenient visualisation and circuit diagram, drawn in a <canvas> context, which blinks at the rate specified. I think this ought to be useful for anyone who likes electronics, but doe not like tedious number-crunching.
Bullets and points.
I want to move this toy project further toward a game project, so it's pretty reasonable to throw in a new variable to keep track of score and a new variable to keep track of ammo, and modify some functions to increment and decrement those scores as needed.
...
   var score = 0;
   var ammo = 10;
...
   clicker = function(event){
    var x = 0;
    var y = 0;
    if(event){
     x = event.pageX - newCanvas.offsetLeft;
     y = event.pageY - newCanvas.offsetTop;
    }
    if(ammo > 0){
     ammo--;
     for(i=0;i<boxes.length;i++){
      box = boxes[i];
      if(Math.abs(x-box.x)<box.size/2 &&
         Math.abs(y-box.y)<box.size/2){
       explodeBox(i);
      }
     }
    }
   }
...

   stickPhysics = function(stick,n){
...
    if(newy > 495){
     sticks.splice(n,1);
     ammo++;
     score++;
    }
...
   }
...
The bold text above is the new stuff. It will keep track of the total number of sticks that fall off the bottom of the screen, with the score variable, as well as the "ammo" the player has available. If ammo runs down to zero, the player can't shoot down any more boxes until more sticks fall off the bottom of the screen.
Another big step from toy to game would be an end condition. In fact, just by implementing ammo I've actually created a condition under which the game can't go any further. All that's left is to let he player know that it's all over and clicking on boxes is fruitless. To do this, a conditional sits in the draw() function and draws a "Game Over" screen if the player has run out of ammo and the sticks array is empty.
...
   draw = function(){
...
    if(ammo == 0 && sticks.length == 0){
     var y = 125;
     newContext.fillStyle='rgba(255,100,100,0.9)';
     newContext.fillRect(20,80,280,320);
     newContext.fillStyle="red";
     newContext.strokeStyle="#000000";
     newContext.font = "45px sans-serif bold";
     newContext.textAlign="center";
     newContext.fillText("Game Over",160,y);
     newContext.strokeText("Game Over",160,y);
     newContext.font = "25px sans-serif";
     newContext.fillStyle = 'black'
     var scoretxt = "Final Score: ";
     newContext.fillText(scoretxt + score,160,y+30);
    }
...
}
This takes care of the case in which the player runs out of ammo, but ignores the case in which the game runs out of boxes. Obviously, if there are no boxes, the game can't continue. Killing just ten boxes and being done, however, isn't all that fun. Rather, the boxes ought to be endless, but harder to kill, so that the player is eventually forced to use up all of his ammo. This means levels!
Levels means altering quite a few things, but without any really major changes. Since it's also nice to know what level a player is on, I'll go ahead and drop in a little scoreboard.
...
   var level = 0;
...
   makeBox = function(x,y){
    ...
    var vx = (level/2+1)*(Math.random()-1.0)/6;
    var vy = (level/2+1)*(Math.random()-1.0)/6;
    ...
   }
...
   init = function(){
    ...
    for(i=0;i<3;i++){
     var x = Math.random()*318 + 1;
     var y = Math.random()*478 + 1;
     makeBox(x,y);
    }
    ...
   }
...
   draw = function(){
    ...
    if(boxes.length == 0){
     level++;
     for(i=0;i<3;i++){
      var x = Math.random()*318 + 1;
      var y = Math.random()*478 + 1;
      makeBox(x,y);
     }
    }
    ...
    if(ammo == 0 && sticks.length == 0){
    ...
     newContext.fillText("You have run out of ammo",160,y+30);
     newContext.fillText("on level "+level,160,y+60);
     newContext.fillText("with a final score of "+ score,160,y+90);
    }
    ...
    // The scoreboard
    newContext.fillStyle="rgba(230,230,230,0.8)";
    newContext.fillRect(320-80,5,75,42);
    newContext.fillStyle="#000000";
    newContext.font="10px sans-serif";
    newContext.textAlign="left";
    newContext.fillText("Ammo: "+ammo,245,18);
    newContext.fillText("Score: "+score,245,30);
    newContext.fillText("Level: "+level,245,42);
    ...
   }
And so, I have a game! Hooray!
The only problem is that if someone plays it in its current form, it takes a click to shoot down a box. This means that to get rid of the hundreds of sticks of ammo a player ends up collecting, the player would have to nearly break his finger clicking the mouse button. A better approach is to have a machine-gun effect, where holding down the mouse button is enough to keep killing boxes.
...
   var lastShot = 0;
   var firing = false;
   var mousex = 0;
   var mousey = 0;
...
   clicker = function(event){
    var x = 5;
    var y = 5;
    newCanvas.onmouseup = up;
    newCanvas.onmousemove = move;
    if(event){
     x = event.pageX - newCanvas.offsetLeft;
     y = event.pageY - newCanvas.offsetTop;
     mousex = event.pageX - newCanvas.offsetLeft;
     mousey = event.pageY - newCanvas.offsetTop;
    }
    shoot();
    firing = true;
   }
   up = function(event){
    newCanvas.onmousemove = null;
    firing = false;
   }
   move = function(event){
    if(event){
     mousex = event.pageX-newCanvas.offsetLeft;
     mousey = event.pageY - newCanvas.offsetTop;
    }
   }
   shoot = function(){
    var x = mousex;
    var y = mousey;
    var t = new Date().getTime();
    if(t-lastShot > 50){
      lastShot = t;
      if(ammo > 0){
      ammo--;
      for(i=0;i<boxes.length;i++){
       var box = boxes[i]
       if(Math.abs(x-box.x)<45 && Math.abs(y-box.y)<45 && box.size == 90){
        explodeBox(i);
       }
       if(Math.abs(x-box.x)<15 && Math.abs(y-box.y)<15 && box.size == 30){
        explodeBox(i);
       }}}}
   }
...
   draw(){
    ...
    if(firing) shoot();
   }
The problems, however, never end. Now that I've got a machine-gun going, it's pretty frustrating to have no real way of telling how fast your ammo's going. The firing rate is high enough, and the <audio> tag is annoying enough to use, that a sound for each shot isn't feasible. Rather, I want to use yet another array of visual elements: bullet holes.
...
   var bulletholes = new Array();

   Hole = function (x,y,t){
    this.x = x;
    this.y = y;
    this.time = t;
   }
...
   draw(){
    ...
     for(i=0;i<bulletholes.length;i++){
     var hole = bulletholes[i];
     var hc = 'rgba(0,0,0,';
     alpha = 1 - (time-hole.time)/3000
     hc = hc + alpha;
     hc = hc + ")";
     if (alpha <= 0){
      bulletholes.splice(i,1);
     } else {
      newContext.fillStyle = hc;
      newContext.fillRect(hole.x-1,hole.y-1,2,2);
     }
    }
...
   shoot = function(){
    ...
    if(t-lastShot > 50){
     ...
     if(ammo > 0){
      bulletholes.push(new Hole(x,y,t));
      ...
     }
     ...
    }
    ...
   }
And the final result is below. It's not quite the same script as in the first post, but it is the same game. That took a rather long time.
Wednesday, February 24, 2010
Explosions!
Boxes are cooler when they explode. Quite reasonably, boxes should explode when clicked on, so I need to reassign the creation of boxes to a function that happens to be not the click handler. The initialization function strikes me as a good place to put all that!
...
   init = function(){ // This function will start things
    time = new Date().getTime();
    setInterval("draw();",20);
    for(i=0;i<20;i++){
     makeBox(5,5);
    }
   }
...
Now, that makes a whole lot of boxes, so let's make some way to explode the damn things:
...
   explodeBox = function(n){
    box = boxes[n];
    boxes.splice(n,1);
    if(box.size == 90)
    for(i=0;i<3;i++){
     var y = (box.y-30)+30*i;
     for(j=0;j<3;j++){
      var x = (box.x-30)+30*j;
      var dvx = (Math.random()-1.0)/9;
      var dvy = (Math.random()-1.0)/9;
      boxes.push(new Box(x,y,box.vx+dvx,box.vy+dvy,30,box.color));
     }
    }
   }
...
This function accepts the index of the box I want to explode in the boxes array as its input and starts by removing that box from the array. After that, the function pushes nine new, smaller boxes into the array, each having the same color as the original and randomly varied velocity.
All that's left is to make some way to tell the javascript that I want some box to explode, and which box it is. I do this by modifying the click handler:
...
   clicker = function(event){
    var x = 0;
    var y = 0;
    if(event){
     x = event.pageX - newCanvas.offsetLeft;
     y = event.pageY - newCanvas.offsetTop;
    }
    for(i=0;i<boxes.length;i++){
     box = boxes[i];
     if(Math.abs(x-box.x)<45 && Math.abs(y-box.y)<45
                             && box.size==90){
      explodeBox(i);
     }
    }
   }
...
The result is quite interesting, visually, but isn't a game yet. Sure, you can click on boxes to make more boxes, but there is no score and no end, so it's just a toy. A good step in the direction of a game is some sort of situation in which the player know he's done, so I'm going to make the smaller boxes explode as well, but this time, the remains won't stay on the screen until the end of time. This way, a "player" can clear the screen and feel good about himself.
So, to destroy boxes altogether, I need to declare an array to hold the elements the boxes break up into. Sticks are my shape of choice, since that's what squares are made up of.
...
   var sticks = new Array();
...
   Stick = function(x,y,theta,vx,vy,length,omega,color){
    this.x = x;
    this.y = y;
    this.theta = theta;
    this.vx = vx;
    this.vy = vy;
    this.length = length;
    this.omega = omega;
    this.color = color;
   }
...
Unlike boxes, sticks can rotate, so the sticks have an extra coordinate, theta, and an extra velocity term, omega. Like boxes, sticks have a color and a size.
Next, I want to modify the function that explodes boxes to be able to handle the smaller boxes:
...
   explodeBox = function(n)...
...
    if(box.size == 30){
     var dvx = (Math.random()-1.0)/11;
     var dvy = (Math.random()-1.0)/11;
     var omega = (Math.random()-1.0)/90;
     sticks.push(new Stick(box.x,box.y+15,0,
                           box.vx+dvx,box.vy+dvy,
                           30,omega,box.color));
     dvx = (Math.random()-1.0)/11;
     dvy = (Math.random()-1.0)/11;
     omega = (Math.random()-1.0)/90;
     sticks.push(new Stick(box.x,box.y-15,0,
                           box.vx+dvx,box.vy+dvy,
                           30,omega,box.color));
     dvx = (Math.random()-1.0)/11;
     dvy = (Math.random()-1.0)/11;
     omega = (Math.random()-1.0)/90;
     sticks.push(new Stick(box.x+15,box.y,Math.PI/2,
                           box.vx+dvx,box.vy+dvy,
                           30,omega,box.color));
     dvx = (Math.random()-1.0)/11;
     dvy = (Math.random()-1.0)/11;
     omega = (Math.random()-1.0)/90;
     sticks.push(new Stick(box.x-15,box.y,Math.PI/2,
                           box.vx+dvx,box.vy+dvy,
                           30,omega,box.color));
    }
   }
...
My next step is to modify the click handler so that it calls the box exploding code for the smaller boxes, as well as the large ones:
...
   clicker = function(event){
...
    for(i=0;i<boxes.length;i++){
     box = boxes[i];
     if(Math.abs(x-box.x)<box.size/2 &&
        Math.abs(y-box.y)<box.size/2){
      explodeBox(i);
     }
    }
...
As well as the drawing function, so it actually draws the sticks:
...
   draw = function(){...
...
    for(i=0;i<sticks.length;i++){
     var stick = sticks[i];
     var x1 = stick.x + (stick.length/2)*Math.cos(stick.theta);
     var y1 = stick.y + (stick.length/2)*Math.sin(stick.theta);
     var x2 = stick.x - (stick.length/2)*Math.cos(stick.theta);
     var y2 = stick.y - (stick.length/2)*Math.sin(stick.theta);
     stickPhysics(stick,i);
     newContext.lineWidth = 3;

     newContext.beginPath();
     newContext.moveTo(x1,y1);
     newContext.lineTo(x2,y2);
     newContext.strokeStyle = stick.color;
     newContext.stroke();
    }
...
A keen eye will spot in there a call to the function stickPhysics, so I should probably make that function so I don't run into errors.
...
   stickPhysics = function(stick,n){
    var newTime = new Date().getTime();
    var dt = newTime - time;
    var newx = stick.x + dt*stick.vx;
    if(newx > 320){
     stick.vx = -Math.abs(stick.vx);
     newx = stick.x + dt*stick.vx;
    }
    if(newx < 0){
     stick.vx = Math.abs(stick.vx);
     newx = stick.x + dt*stick.vx;
    }
    stick.x = newx;
    stick.theta = stick.theta+dt*stick.omega;
    if(stick.theta > 2*Math.PI){
     stick.theta = stick.theta - 2*Math.PI;
    }
    if(stick.theta < 0){
     stick.theta = stick.theta + 2*Math.PI;
    }
    stick.vy = stick.vy + dt*0.0001;
    var newy = stick.y + dt*stick.vy;
    stick.y = newy;
   }
...
The result of all this is below
Next time, I work to make this more into a game and less of a toy.
Subscribe to:
Posts (Atom)